
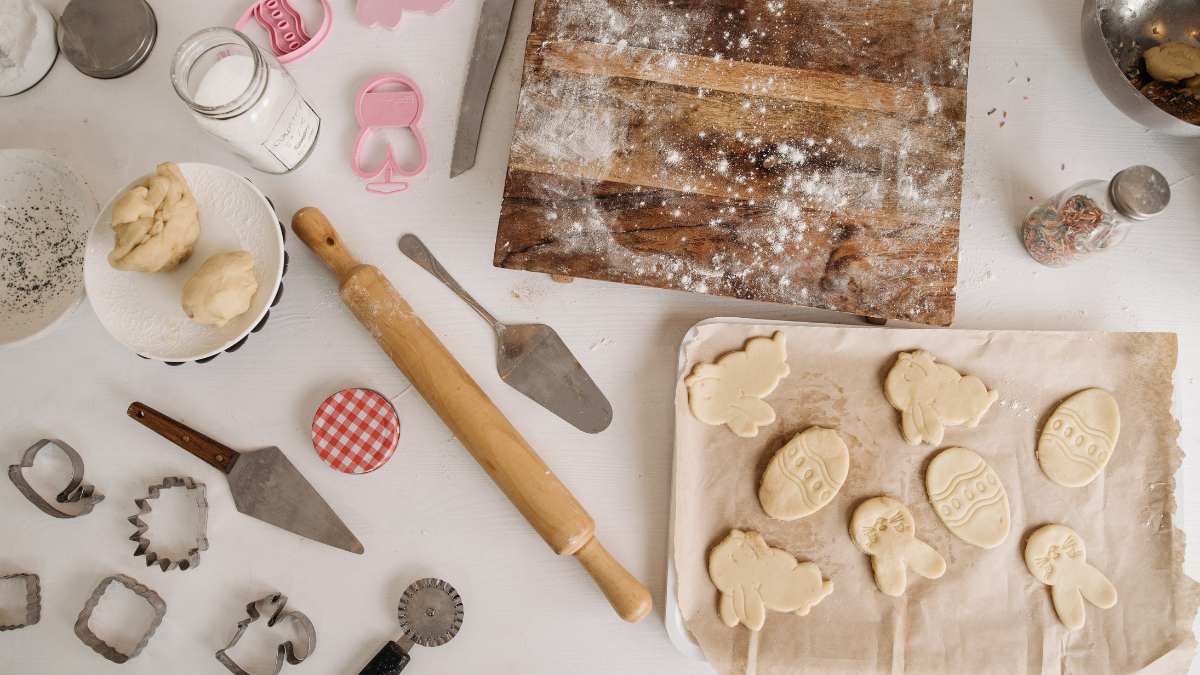
9 Essential Cookie Baking Tools for Beginners (Expert Picks)
Starting your cookie baking journey but unsure which tools you really need? You’re not alone — I’ve been there too. When I first began baking at home, I had no idea how important the right tools were. Now, after 17 years of hands-on experience in the biscuit and cookies industry, I can confidently guide you through the essentials.
Cookie baking isn’t just about mixing ingredients — it’s a process. From weighing and mixing to shaping dough, baking, cooling, and storing — each step requires the right equipment to get consistent, delicious results. In this guide, I’ll walk you through 10 essential cookie baking tools for beginners, explaining how and why each one matters.
Why the Right Tools Matter in Cookie Baking
Cookie baking may seem simple, but the tools you use can make or break your results. A small measuring error, uneven mixing, or poor tray material can lead to underbaked centers, burnt bottoms, or flat, lifeless cookies. That’s why using the right tools at each stage — from weighing to mixing to cooling — is key to achieving professional-level results at home.
With over 17 years of experience in the biscuit and cookie industry, I’ve seen how the smallest tool choice can dramatically affect taste, texture, and consistency. Whether you’re just getting started or looking to upgrade, these essential tools will guide you toward success.
Essential Tool List
Following are the essential cookie baking tools that every beginner, even expert baker, needs.
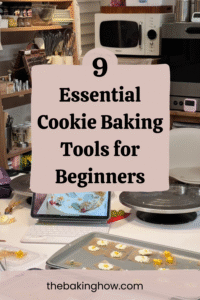
Digital Kitchen Scale – Precision in Every Gram
The taste, texture, and shape of cookies all start with one thing: accurate measurements. Baking is a science, and even a small error in the amount of flour, sugar, or butter can ruin the final outcome. That’s why a digital kitchen scale is one of the most essential tools for beginners.
Using a scale ensures you follow the recipe exactly, especially when converting from cups to grams. Unlike measuring by volume, weighing ingredients gives you consistency, batch after batch.
Expert Tip:
In my industry work, we always rely on scales with milligram precision — especially for weighing small but powerful ingredients like vanilla flavor, baking soda, or food coloring. This level of detail can make a big difference in both taste and appearance.
Recommended Feature:
Look for a digital scale with a milligram unit option, a tare function, and easy-to-read display.
Mixing Bowl + Whisk or Hand Mixer – The Heart of Cookie Preparation
Once your ingredients are measured, the next step is mixing — and that’s where a good mixing bowl paired with the right mixing tool becomes essential.
Mixing bowl material
Start with a set of sturdy mixing bowls — ideally in different sizes — to help handle both dry and wet ingredients separately. I always recommend bowls with non-slip bases to prevent slipping during mixing. Stainless steel, glass, or BPA-free plastic are great beginner-friendly options.
Mixing tools
For mixing tools, beginners often use a simple whisk, which works well for light batters. But if you want to save time and get smoother results, invest in a hand mixer. It’s especially helpful when creaming butter and sugar — a key step in cookie baking.
Pro Tip from My Industry Experience:
We always focus on the uniformity of dough. A good hand mixer helps avoid overmixing and ensures every batch has the same texture — soft, chewy, or crispy, just the way you want.
I personally use and recommend this compact hand mixer from Temu — it’s easy to clean, powerful, and perfect for beginners
Cookie Scoop – Consistency Made Simple
After mixing the dough, the next key step is shaping uniform cookie pieces — and this is where a cookie scoop becomes a game changer. If the size and weight of each unbaked cookie varies, you’ll get uneven results:
- Smaller cookies bake faster and may become too dark or dry
- Larger cookies stay doughy or undercooked in the center
That’s why consistent portioning is essential — both for quality and appearance.
Industry Insight:
In commercial baking, we use forming machines to ensure each cookie has the exact same weight and size. At home, you can achieve a similar level of consistency using a cookie scoop. It helps you portion your dough quickly and accurately — especially useful when baking in batches.
Expert Recommendation:
Choose a scoop with a spring-release handle and multiple size options (like small, medium, and large) to suit different cookie styles.
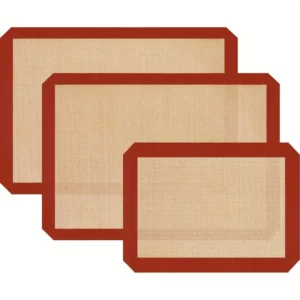
Parchment Paper or Silicone Baking Mat – Non-Stick Surface Made Easy
In home baking, one common issue beginners face is cookies sticking to the tray — ruining their shape and making cleanup messy. That’s where parchment paper or silicone baking mats come in handy. They create a smooth, non-stick surface that helps cookies bake evenly and release cleanly.
Important Note from My Industry Experience:
In industrial baking, we don’t use parchment or silicone mats. Instead, we use continuous ovens with steel bands or wire mesh belts, which are part of automated production systems. But for home baking, parchment paper or reusable silicone mats are a smart and practical solution.
Recommendation:
- Use parchment paper for easy, single-use convenience
- Try a silicone baking mat for eco-friendly, long-term use
- Both help prevent burning and promote even cookie spread
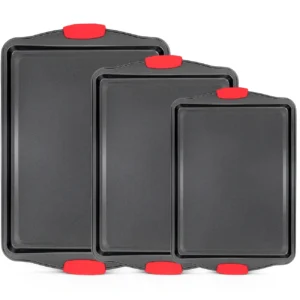
Baking Tray – The Foundation of Even Baking
A quality baking tray is one of the most underrated tools in cookie baking — but it can make or break your results. The material, color, and thickness of the tray all affect how your cookies bake.
If the tray is too thick or overly heat-resistant, it slows down the heat transfer. This can cause the cookies to become firm on the outside without spreading properly. On the other hand, a thin tray heats too quickly, leading to cookies that are overbaked or even burnt at the bottom — often before the center is fully cooked.
Industry Insight:
In professional baking, we always use aluminum trays with medium thickness. They offer balanced heat distribution and reliable results.
Recommended:
Choose a dark-colored, non-stick baking tray with medium weight. It helps develop even browning and makes cleanup easier.
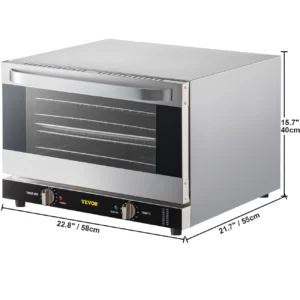
Oven – The Heart of Baking
An oven is the core tool in cookie baking — without it, there’s no real baking! For perfect results, your oven must deliver even heat from the top, bottom, and sides. It should also have a calibrated temperature gauge so you can follow recipes precisely and avoid under- or over-baking.
Industry Insight:
In commercial production, we use continuous ovens with different heating systems depending on the product.
- Direct gas fire ovens are ideal for crisp biscuits
- Convection ovens are better for soft, chewy cookies
For home baking,
I recommend using a convection oven with top and bottom heating elements. Convection ensures even heat distribution, which is critical for uniform baking. Always preheat your oven and place your cookie tray in the center rack to promote even browning and texture. I recommended checking out this beginner friendly convection oven on Temu, it has precise temperature control and a compact design.
For even more cookie baking tips, check out
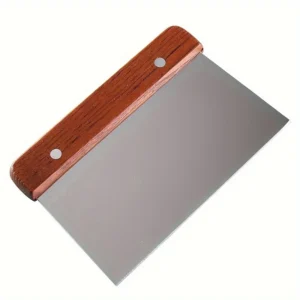
Stainless Steel Scraper – Clean Lifts, No Cracks
After baking, cookies are still soft and delicate. If you try removing them by hand or with a thick spatula, you risk breaking their shape — especially when they’re warm. A stainless steel (SS) scraper is a simple but powerful tool that helps you gently lift cookies off the tray without damaging them.
Industry Insight:
In industrial production, we use a fixed SS knife at the end of the oven’s steel belt. As the belt moves, the knife gently scrapes baked cookies off and transfers them onto the cooling conveyor — all without cracks or shape loss.
At home, you can achieve a similar result using a flat SS scraper. Just slide it under the edge of the cookie and lift it smoothly from the tray. It reduces waste and helps preserve the look of your cookies — especially important when baking for gifting or selling.
Tips:
Choose a scraper with a thin edge and comfortable handle for better control.
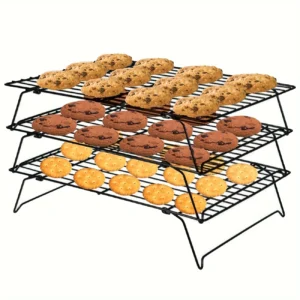
Cooling Rack – Lock in the Texture
One of the most overlooked steps in cookie baking is cooling — but it’s absolutely critical for achieving the perfect texture. Right after baking, cookies are still soft and fragile. If they’re left on a hot tray, they can become overcooked on the bottom and lose their intended shape or texture.
A cooling rack with an open mesh design allows air to circulate underneath the cookies, helping them cool evenly from both sides. This prevents sogginess and helps them firm up just right.
Industry Insight:
In commercial baking, we use cooling conveyors — moving belts that allow cookies to cool from the top and bottom simultaneously. The cookies travel for the same duration as their baking time to ensure consistent texture before packing.
Home Tip:
As soon as you lift your cookies from the tray using a stainless steel scraper, place them on the cooling rack. Let them rest for at least the same amount of time as the baking duration before moving or storing.
Airtight Jar or Sealable Bag – Keep Cookies Fresh Longer
After baking and cooling, you’re left with two options:
Eat all the cookies now — or store them for later cravings!
If you go with the second (smart!) option, then proper storage is a must. Leaving cookies in the open air allows moisture to seep in from the atmosphere, making them soggy, soft, or stale.
To keep cookies fresh and maintain their texture, use an airtight jar or sealable zip-lock bag. These containers prevent exposure to humidity and preserve crispness, especially for butter or sugar cookies.
Industry Insight:
In large-scale production, we use metalized wrappers and automated sealing machines to lock in freshness. While home bakers don’t have that, you can still mimic it effectively.
Pro Tip:
For maximum crispiness, use both!
First place the cookies in a zip-lock bag, then put the bag inside an airtight jar. This double-layer helps protect texture, flavor, and aroma — especially in humid conditions.

Final Thoughts Essential Cookie Baking Tools for Beginners
Cookie baking is more than just mixing ingredients — it’s about using the right tools at each step to get consistent, delicious results. Whether it’s measuring with precision, mixing with ease, baking evenly, or storing properly — the tools you use can make all the difference.
As someone who has spent over 17 years in the biscuit and cookie industry, I can say confidently: mastering the basics is the first step to baking like a pro. Start with the tools we’ve covered here, and you’ll notice the difference in every batch you bake.
check out our blog: Common cookie baking mistakes to avoid
Ready to upgrade your baking setup?
Start with just a few tools — like a digital scale, mixing bowl, and cookie scoop — and build from there. Every expert was once a beginner!
👉 Want to avoid common cookie mistakes? Read our cookie baking mistake guide here
📌 Loved this post? Pin it on Pinterest and share with your fellow bakers!